Front Squat vs Back Squat — Key Differences Explained
Bar Position, Grip, and Setup
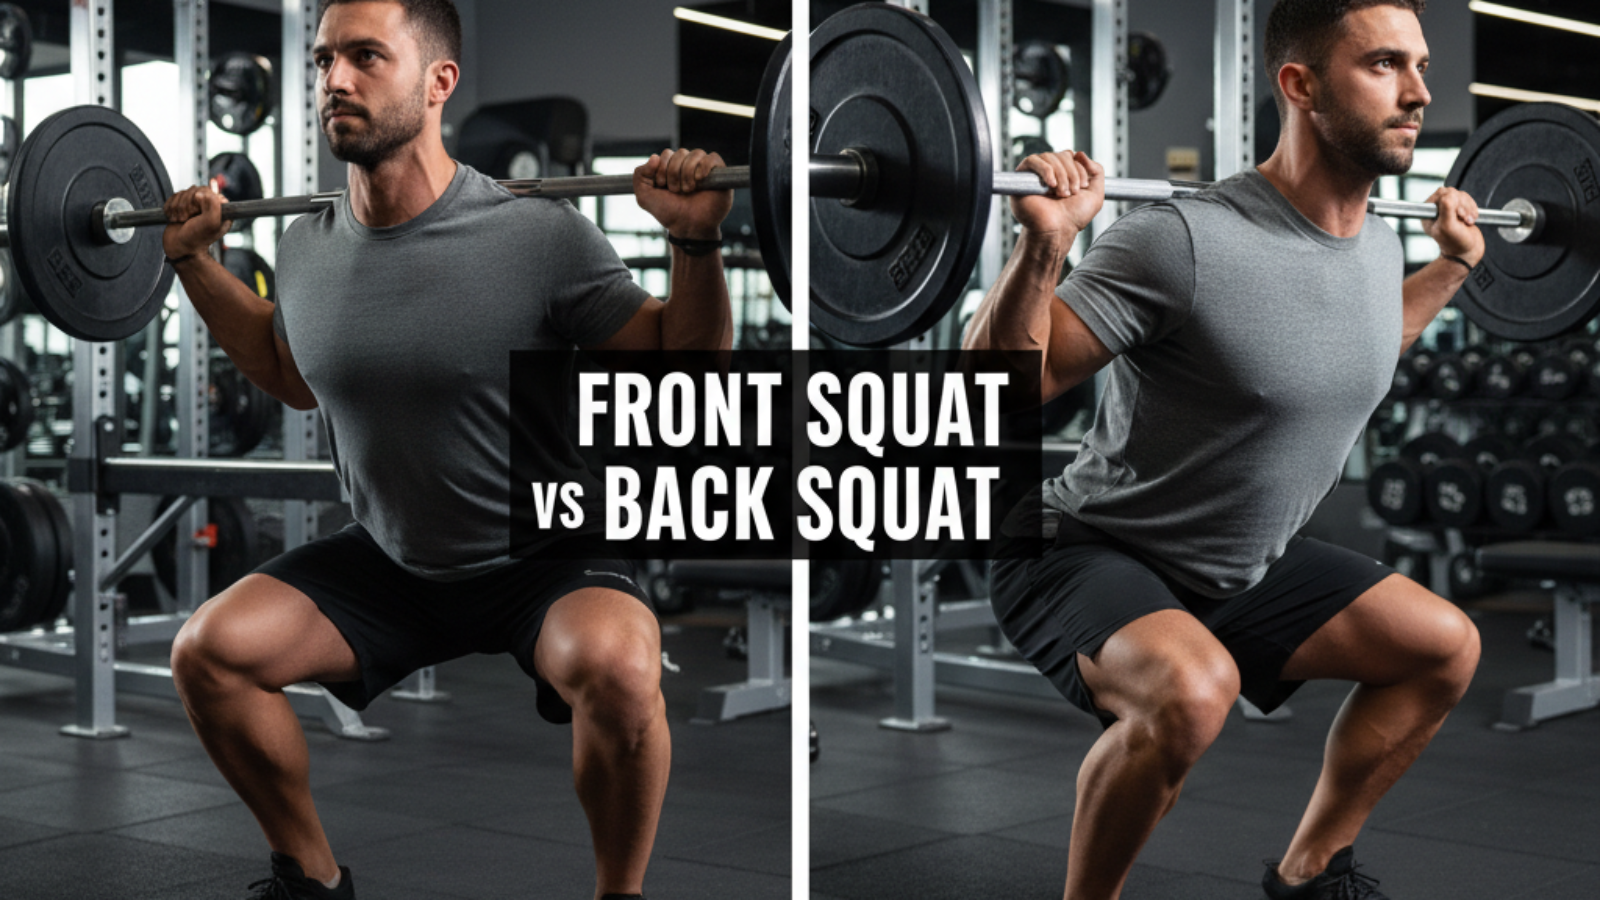
Understanding the bar position, grip, and setup is key to mastering front squats and back squats. In a front squat, the barbell rests on the front of your shoulders, just above your collarbone. Your elbows point forward, and your hands lightly grip the bar. In a back squat, the barbell rests on your upper back, not on your neck. Your hands grip the bar wider, and your elbows point down. These positions change how you balance and move during each squat.
Muscle Activation and Primary Benefits
Front squats mainly work your quadriceps, or the front of your thighs. They also challenge your core and upper back. Back squats use your glutes and hamstrings, or the back of your legs, as well as your lower back. If you want to build leg size or strength, both are great. The front squat is often better for improving posture and keeping your back upright. The back squat lets you lift heavier weights for total power.
Load Capacity and Movement Mechanics
Most people can lift more weight with a back squat than a front squat. The back squat’s bar position allows for greater stability. In the front squat, you must keep the bar from falling forward by staying upright and engaging your core. The movement in a front squat is often deeper, while the back squat may allow a wider stance and more hip movement. Both require good form for safety.
How to Perform the Front Squat Properly
Step-by-Step Technique Breakdown
- Step 1: Stand tall with your feet shoulder-width apart. Place the barbell on a squat rack at chest height.
- Step 2: Get under the bar so it rests across the front of your shoulders. Cross your arms or use an open hand grip.
- Step 3: Keep your elbows high and chest up. Lift the bar off the rack by standing up.
- Step 4: Take a step back, set your feet about shoulder width, and turn your toes slightly out.
- Step 5: Take a breath, brace your core, and begin the squat by sending your hips slightly back and bending your knees.
- Step 6: Lower your body until your thighs are at least parallel to the ground. Keep your chest up and elbows high.
- Step 7: Push through your feet to stand back up to starting position. Exhale at the top.
Common Mistakes and Correction Cues
- Dropping elbows: Keep elbows high to balance the bar.
- Leaning forward: Focus on an upright torso and a strong core.
- Heels lifting: Keep your heels flat on the ground.
- Shallow depth: Go low enough for thighs to reach parallel or below.
Warm-Up and Mobility Routines for Front Squats
- Ankle mobility: Rock gently back and forth to loosen ankles for deep squats.
- Hip stretches: Perform lunges or hip circles to open hips.
- Wrist and shoulder stretches: Do wrist rolls and shoulder circles for better grip comfort.
- Bodyweight squats: Practice a few reps with no weight to warm up your muscles.
How to Perform the Back Squat Correctly
Step-by-Step Technique Breakdown
- Step 1: Stand with your feet shoulder-width apart. Set the barbell on a squat rack at the level of your upper chest.
- Step 2: Get under the bar so it rests on your trapezius muscles, below your neck.
- Step 3: Grip the bar wider than shoulder-width. Keep your elbows under the bar.
- Step 4: Lift the bar off the rack by standing up. Take one or two steps back.
- Step 5: Set your feet shoulder-width apart, toes straight or slightly outward.
- Step 6: Take a deep breath, brace your core, push your hips back, and bend your knees to start the squat.
- Step 7: Lower down until your thighs are at least parallel to the ground. Keep your back straight.
- Step 8: Push through your heels to return to standing. Exhale as you stand tall.
Common Mistakes and Correction Cues
- Bar too high on the neck: Rest the bar on upper back muscles, not the neck.
- Knees caving in: Push knees outward on the way down and up.
- Rounding the back: Keep the chest proud and back straight.
- Not going deep enough: Try for thighs at least parallel to the floor.
Warm-Up and Mobility Routines for Back Squats
- Hip and glute bridges: Activate hips and glutes before squatting.
- Bodyweight squats: Practice squats with no weight to ensure good movement.
- Light back extensions: Warm up your lower back muscles.
- Walking lunges: Prepare your legs and hips for squatting.
Front Squat vs Back Squat — Which Should You Choose?
Identifying Your Training Goals (Strength, Muscle, Rehab)
If your goal is pure leg strength and lifting heavy, back squats may be best. If you want to improve posture, core stability, or have knee issues, front squats may suit you more. Those needing to improve mobility or coming back from an injury often start with front squats. Both movements help build muscle and strength.
How to Transition Between Front and Back Squats
- Start by doing both with light weights to learn bar position and movement.
- Practice front squats to improve core and posture before adding heavy back squats.
- Use goblet squats (holding a dumbbell) as a bridge between variations.
- Switch between them in your training week to balance development.
Case Studies: Athletes and Rehab Examples in 2026
- Athlete A: Uses front squats to boost sprint speed by building explosive leg strength.
- Athlete B: Chooses back squats for powerlifting meets, focusing on max strength.
- Rehab Case: Physio recommends front squats after minor knee injuries to reduce joint strain.
Programming Both Variations in Your Routine
Sets, Reps, and Weekly Schedule
| Movement | Sets | Reps | Days per week |
|---|---|---|---|
| Front Squat | 3-4 | 8-12 | 1-2 |
| Back Squat | 4-5 | 5-8 | 1-2 |
Progressive Overload Strategies
- Increase the weight by 2.5-5 kg when you can do all sets and reps easily.
- Add a set or two over the weeks to boost challenge.
- Focus on better form or deeper squats before adding more weight.
- Keep a training log to track progress every week.
Example Plans for Specific Outcomes
- For muscle growth: Do both squats in the same week, higher reps (8-12) for front squats, moderate reps (5-8) for back squats.
- For strength: Focus more on back squats, lower reps (3-6) and heavier weights, use front squats as assistance work.
- For rehab or mobility: Start with light goblet or front squats, focus on form and flexibility, progress slowly.
Troubleshooting & Frequently Asked Questions
Technique Troubleshooting Guide
- If the bar rolls off your shoulders in front squats: Increase elbow height and upper back tightness.
- If you lean forward in back squats: Brace your core and keep eyes forward.
- If you have knee pain: Check your stance width, toe angle, and make sure knees track over toes.
Addressing Myths and Misconceptions in 2026
- Myth: Back squats are dangerous for your back. Fact: With correct form, back squats are safe and effective.
- Myth: Squatting below parallel is bad for your knees. Fact: For most people, deep squats are safe if performed with control.
- Myth: Only athletes need to squat. Fact: Squats benefit everyone, from students to working adults.
Form Checklist for Safe Squatting
- Feet shoulder-width apart
- Chest up, back flat
- Knees track over toes
- Heels stay on the ground
- Control both the lowering and rising phase of the squat
Front Squat vs Back Squat Video Demonstration & Analysis
Watching a video helps you see both squats in action. Look for clear examples on official fitness or sports channels. Notice the bar position, depth, and form. Comparing movements will help you master both squats safely and effectively.
References & Further Reading (2026 Update)
- National Strength & Conditioning Association: Squat Techniques Guide (2025)
- International Federation of Sports Medicine: Safe Squatting Research Review (2026)
- Physiopedia: Knee Rehabilitation and Squat Progressions (2026)
- Strength Training Textbooks and Peer-reviewed Journals (latest available)
- Online video tutorials from certified trainers and sports organizations